Too many mattresses are often improperly disposed of or are not always recycled, which can be a problem as the landfills grow larger each year. If you’re looking into disposing of your mattress, you need to know how to cut up a mattress.
Naturally, recycling regulations vary from state to state, with places like California and Rhode Island requiring by law that residents recycle their beds. You should check the laws for your state and make sure you’re doing what is in accordance with their regulations.
It can seem daunting at first to break yours down, but it’s not as hard as some people may think.
6 Steps to Breaking Down Your Mattress
Gathering The Proper Tools
First off, you’re going to need the right set of equipment to handle this task. Normally, you should be able to find most of these supplies at your local hardware store, as they’re typically common.
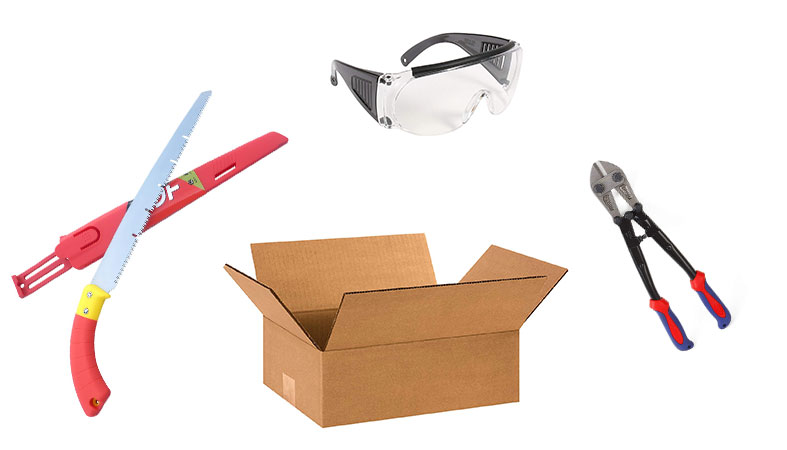
You’ll need a saw, a bolt cutter or wire clippers, boxes to store any loose parts you get from the process, eyewear to protect your eyes, some durable gloves, preferably cut-resistant ones, a good pair of pliers, a utility knife and a box cutter. Make sure that you get all of these, as you don’t want to make multiple trips back to the store.
Step 1: Remove the Cord from the Edges
For this part, use your utility knife to get rid of the piping thread. Follow the thread to its end, then you tug until it comes loose from the bedding. Do this for every side until it is done.
You’ can recycle the thread for other uses or donate it, whichever is most convenient for you. It could be beneficial to keep if you think it can be repurposed.
Step 2: Cut off the Side Panels
Removing the side panels is an important step that could prove to be rather difficult. If you are new to this process, you might want to be extra careful, as you could end up hurting yourself. With that being said, remove the sides with your hands once the material has been cut/ripped enough to remove the binding cords and then take off the sides themselves.
Step 3: Remove the Top and Bottom Layers
The next step is simple but necessary, and it shouldn’t take you too long. When you’re removing the top and bottom layers, it’s important to keep an eye out for any staples. These are used to keep the fabric on the outer layer bound and secure.
Take off the fabric until you see foam or cotton padding. Once this is achieved, gently slip off the top layer until it’s completely off.
Step 4: Sort the Internal Layers and Fabric
The next step requires some precaution. Get your gloves ready, because it could get a bit messy. You should collect all of the inner filling and fabric up and ready it for either recycling or reusing.
You should store the filling and so on somewhere dry, preferably in a bag, until you figure out what you’re going to do with it. Figure out what can be recycled and how the material could be potentially reused.
Step 5: Carefully Cut the Metal Springs
Safety should be a priority for this next step. There’s a chance for injury, as the metal springs may be quite sharp. You may want to wear gloves and have your wire cutters ready.
Once the fabric is removed, you should only have springs left. You’re then going to need to slice up all of the springs into smaller parts. These can be reused for a variety of purposes if you don’t want to just throw them out.
Learn More: How to Dispose of Your Mattress
Frequently Asked Questions
What if there is a fiberglass fire barrier
This is important to consider when you’re cutting up your mattress, as you could potentially get fiberglass everywhere if you’re not too careful. Be sure to carefully dispose or recycle the material after removing it. If you’re not entirely sure how to handle it, you could consult with a local recycling center as to what to do.
Need a new mattress? Explore our top picks for the best mattresses without fiberglass.
Conclusion
Recycling a bed can be of great use to both you and the environment, as you’re getting rid of old bedding you no longer want, while potentially giving new life to old things. It can be intimidating when you’re starting out but with a few tips, you should be able to handle it perfectly.
Hopefully, with this guide, you’ll know exactly what to do and how to do it. If you use the right tools and take the proper precautions you should do just fine. Take care not to hurt yourself and all the steps should go according to plan.
Jill Zwarensteyn
Editor
About Author
Jill Zwarensteyn is the Editor for Sleep Advisor and a Certified Sleep Science Coach. She is enthusiastic about providing helpful and engaging information on all things sleep and wellness.
Combination Sleeper

